
Planning a Marine Holding Tank Installation: What to Decide First
26th Oct 2026
We rarely hear a boat owner complain that a holding tank is too big. What we hear frequently is that the tank fills up faster than expected.
Capacity deserves attention, but it’s only one part of planning a marine holding tank installation. Where the tank sits, how the hoses and vent run, and how you’ll empty the tank all affect how well the system works. Making those decisions before you order can help prevent odor problems, difficult maintenance, and more frequent pump-outs than you planned.
How Much Holding Tank Capacity Do You Need?
A marine holding tank, also called a black water tank, stores sewage from your boat’s toilet. Black water contains human waste, while gray water comes from showers, sinks, and appliances.
Start with how you use the boat now and how you might use it later. Day trips with two people place different demands on a tank than a long weekend with family or guests. Decide how many days you’d like to go between pump-outs, then consider:
- People aboard: Include the crew and guests you expect on a typical trip.
- Flushes per person: Allow roughly five to 10 flushes per person during a full 24-hour day aboard, depending on activities.
- Water per flush: Check your toilet’s specifications and settings. Water use may depend on how long someone holds a button or foot pedal, or how many times they pump a manual toilet.
Multiply the number of people by their expected daily flushes and the water used per flush, then multiply by the days between pump-outs. That gives you the flush-water volume. You’ll also need an allowance for human waste and extra capacity for additional use.
When space and installation requirements allow, a larger tank gives you more flexibility. Don’t size the tank around the expectation that every trip will go exactly as planned.
Measure for the Tank, Connections, and Maintenance Access
Measure the intended location, including clearance above and around the tank for fittings and hoses. A tank can fit inside a compartment without leaving enough room to connect the plumbing.
Plan for the weight of a full tank, too. At roughly eight pounds per gallon, 40 gallons of liquid adds about 320 pounds before accounting for the tank itself. As the boat moves through waves, sloshing liquid can exert sideways and even upward forces. The tank needs solid support and secure mounting to prevent movement.
Leave access to the inspection opening, discharge pump, and vent filter, if installed. Follow the tank manufacturer’s mounting instructions, and think about how you’ll reach serviceable components after surrounding equipment is back in place.
Keep Sewage from Sitting in the Discharge Hose
Trace the route from the toilet to the tank before settling on a tank location. You may need to pass through bulkheads, the walls dividing the boat’s compartments, or work around other equipment.
Choose the most direct practical route, without dips that hold sewage. Standing waste accelerates permeation, which happens when odor passes through the hose material even though the hose isn’t leaking.
A good sanitation hose resists permeation, but prolonged contact with trapped sewage can eventually cause odor problems. A lower-quality hose may develop those problems much sooner.
Where a low section can’t be avoided, we recommend properly installed PVC pipe for the section that will retain sewage. Identifying that need during planning is easier than changing the plumbing after everything is connected.
Plan a Vent Route That Won’t Trap Water
Air has to leave the tank as it fills and enter as it empties. The vent handles both jobs, so its size and routing matter.
For many pleasure-boat installations, a ¾-inch (19 mm) vent is sufficient. Some larger commercial toilet systems require a larger vent, so check the requirements for your equipment.
The vent line should have no dips where liquid can collect. Here’s a useful check: if water enters the line at its highest point, can it drain back toward the tank or out through the vent fitting without getting trapped?
Locate the vent outlet high above normally occupied areas when practical. If the vent exits through the hull side, run the line to the highest practical point before bringing it down to the outlet. The fitting needs to remain above the waterline as the boat changes trim or, on a sailboat, heels. On some installations, vents on both sides can help prevent a vent outlet from becoming submerged when the vessel heels or changes trim.
Adding a vent filter? Install the filter above the tank’s highest possible liquid level, where condensation and wave splash are unlikely to reach it. A wet filter can act like a plug and restrict airflow.
Read How Vent Filters Help Control Holding Tank Odors on Boats for more on filter placement and odor control.
Decide How You’ll Empty the Holding Tank
Plan the plumbing for shoreside pump-out and, if appropriate for where you boat, permitted overboard discharge.
A shoreside pump-out uses equipment at the dock to remove waste. For permitted overboard discharge, most installations need a suitable discharge pump. A tank located above the waterline may allow gravity discharge through an appropriately installed valve instead. Common pump options include:
- Rubber-impeller macerator pumps, which grind solids as they pump.
- Diaphragm pumps, which use a flexible diaphragm to move waste.
- Bellows pumps, including Dometic’s T-Pump.
The right choice depends on the system and installation.
Discharge rules also affect your plans. Untreated sewage discharge is prohibited within three miles of shore in U.S. waters, and designated no-discharge zones prohibit both treated and untreated sewage discharge. Before planning overboard discharge, check the EPA’s list of vessel sewage no-discharge zones by state, and confirm local requirements with the relevant state boating agency. Your marina can also help you locate a nearby pump-out facility.
Choose a Tank Material That Fits the Application
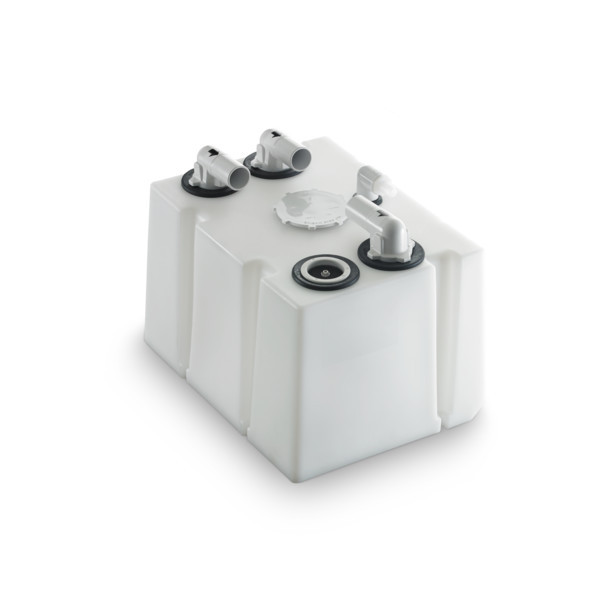
A good-quality rotationally molded polyethylene tank is a practical choice for many boats. Dometic and other manufacturers offer a variety of sizes and shapes, so check available tanks before assuming you need a custom build.
If a stock tank won’t provide the capacity and shape you need, other materials are available, but construction details matter:
- Custom fiberglass: Requires correct lamination with osmosis-resistant resin.
- Stainless steel: Should be high-quality 316L or equivalent, with expertly welded joints.
- 5000-series aluminum: Needs an internal epoxy coating because sewage can be highly corrosive, even to this corrosion-resistant alloy.
- Welded polypropylene: An option where a qualified fabricator is available.
Discuss custom tank requirements with a qualified fabricator. Environmental Marine can also help identify a Dometic polyethylene tank that may fit before you pursue custom construction.
Plan Tank Connections Before Ordering
List the connections you’ll need, including the toilet inlet, vent, and pump-out or discharge connections. The equipment being connected determines fitting sizes, while the tank’s shape and available clearance help determine placement.
In general, we recommend placing connections through the top of the tank. If overhead clearance won’t allow top-mounted fittings, side connections should be as close to the top as possible.
A sealing grommet, such as a Uniseal, can provide a straightforward pipe-to-tank connection. The grommet fits into a correctly sized hole, and the pipe or fitting pushes through it to form the seal. Match the seal to the pipe dimensions and tank wall thickness, and follow the specific product’s installation requirements.
Check these details before ordering. Finding the right tank dimensions won’t help if the fittings can’t be installed in the space available.
Choose How You’ll Monitor the Tank Level
A high-level warning tells you the tank is nearly full. A system that displays several levels gives you more information for planning a pump-out.
Some tank-level monitors show stages such as empty, low, three-quarters, and full. Others measure and display the level continuously. Sensing methods vary, too: float switches move with the contents; pressure-based systems measure air pressure in a tube; and external sensors detect liquid through the tank wall.
Choose a monitor compatible with the tank material and installation. Plan sensor placement and service access while the tank is still easy to reach.
Get Help Planning Your Holding Tank Installation
You don’t need to have every fitting selected before asking for help. Start with your available dimensions, toilet model, expected number of people aboard, and desired time between pump-outs. Photos of the compartment and existing plumbing can help explain the space.
Environmental Marine can help identify a Dometic holding tank that may fit and discuss the hoses, fittings, vent components, pumps, and monitoring equipment your system needs. Call 800-522-2656 to talk through your installation before ordering. Or, contact us online.
Frequently Asked Questions
How do I know whether my holding tank is large enough?
Consider how many people use the toilet, its water consumption, and how long you want to go between pump-outs. Include human waste and reserve capacity in your estimate. If your current tank fills too quickly, review both its capacity and the toilet’s flush-water settings before choosing a replacement.
Do I need an onboard discharge pump for dockside pump-out?
The dockside pump-out equipment provides the suction to empty the tank, so an onboard discharge pump generally isn’t needed for that purpose. An onboard pump is used for overboard discharge where permitted.
Can holding tank fittings go on the side?
Yes, when there isn’t enough clearance for top-mounted fittings. Environmental Marine recommends keeping side connections as close to the top as possible. Confirm the arrangement and fitting requirements for the tank you choose.
Does every holding tank need a vent filter?
No. A filter can help when vent odors are noticeable around occupied areas or nearby boats. The tank still needs a correctly sized, unobstructed vent, whether or not a filter is installed.
How long should a marine holding tank last?
A properly installed tank can provide years, and sometimes decades, of service with routine maintenance. Material quality, fabrication, support, and installation conditions all affect its service life.
Still have questions? Explore our Frequently Asked Questions for expert answers on marine sanitation systems, marine plumbing products, replacement parts, and more.